Init containers are used quite often in Kubernetes and Azure Kubernetes Service. They are not very different from your regular containers. You need to remember only two things – initContainers always run till completion and an init container must end before the next one starts.
To create them, you can define initContainers inside pod spec, similar to regular containers.
Tutorial: Using Init Containers
For our example we will run a simple solution. I am going to deploy a busybox image, both as regular container as well as an init container. Regular container won’t start untill init container is able to find a service, named myservice.
You download following YAML file from my GitHub repository as well. If you don’t know how work with YAML files, read my detailed post on how to write Kubernetes YAML files.
     1  apiVersion: batch/v1
     2  kind: Job
     3  metadata:
     4    name: hello
     5  spec:
     6    template:
     7      # This is the pod template
     8      spec:
     9        containers:
    10        - name: hello
    11          image: busybox
    12          command: ['sh', '-c', 'echo "Hello, Kubernetes!" && sleep 60']
    13        restartPolicy: OnFailure
    14        initContainers:
    15        - name: init-busybox
    16          image: busybox
17 command: ['sh', '-c', 'until nslookup myservice; do echo waiting for myservice; sleep 2; done']- Line 14: initContainers are defined here, pretty similar to our regular containers (at line 9).
- Line 17: Custom command is mentioned here. It basically says to check for service named myservice. Until it does, it keeps pasting logs saying it’s waiting for myservice.
Lets deploy this YAML file and see what happens.
# Deploy the batch job
kubectl create -f simple-init-container.yaml

# Check the pods from default namespace
kubectl get pods
Here’s the output.

As you could see it’s waiting for initContainers to complete first. Lets check logs for this pod.
Note: since more than one containers are present inside the pod, kubectl command should also mention the container name. In our case, it’s init-busybox.
# Get logs from pod hello-n4w2b and container init-busybox
kubectl logs hello-n4w2b -c init-busybox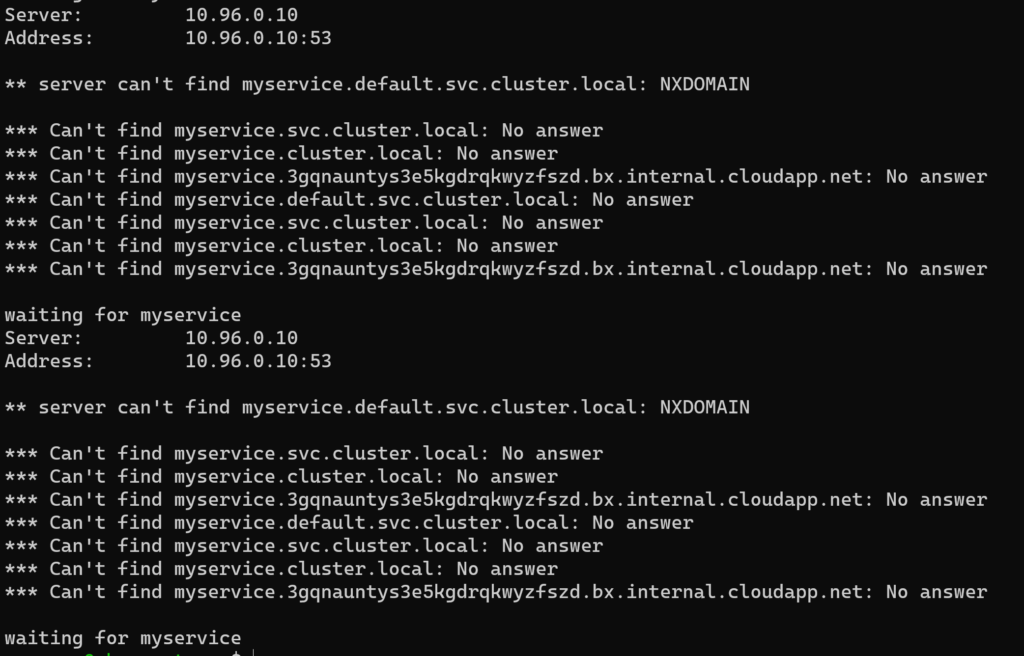
This is just a small snapshot of the entire logs. But you get the complete picture, right? Now what happens if we create a service named myservice. To do this, I will expose my hello pod using following command.
# Expose hello pod using expose command.
kubectl expose pod hello-n4w2b --port 80 --name myservice

# Check all the pods again
kubectl get pods
As expected, once our init container completed our main app container, and pod, are up and ready.
Let me know if you have any queries or questions on this.We can run through the troubleshooting together.